Category Archives: Baking

Strawberry Rhubarb Pie

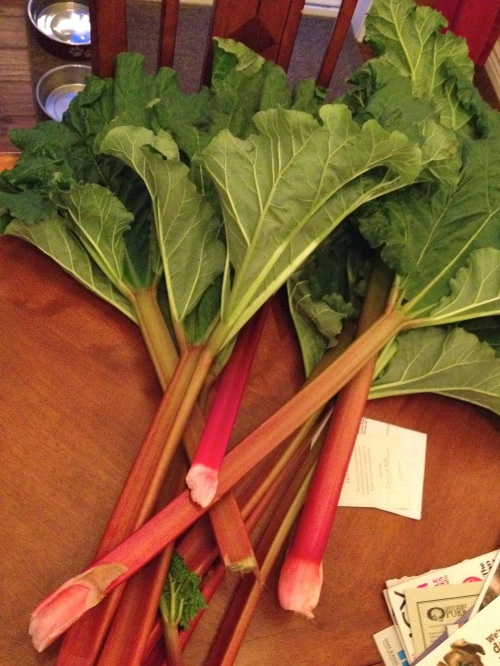
It’s spring in Montana, so that means there are some yummy treats being made with our rhubarb.  This is our plant’s third season planted here, and I love seeing it come back bigger and better every year.

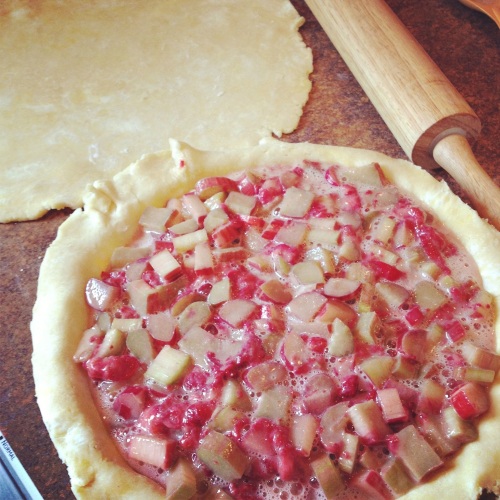
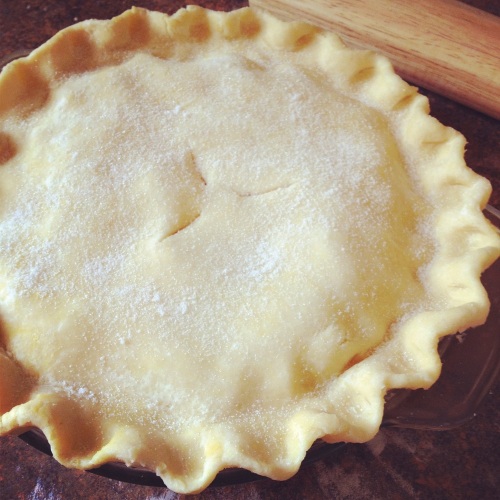
The leaves and stalks are huge, they took up half of our dining room table.  I froze a lot of berries last summer from our garden and some produce farms in WA that we visited, so with the strawberries I stored away in the freezer I’ve been making Strawberry-Rhubarb Custard Pie lately.  So good, I love the sweet and tart combination.

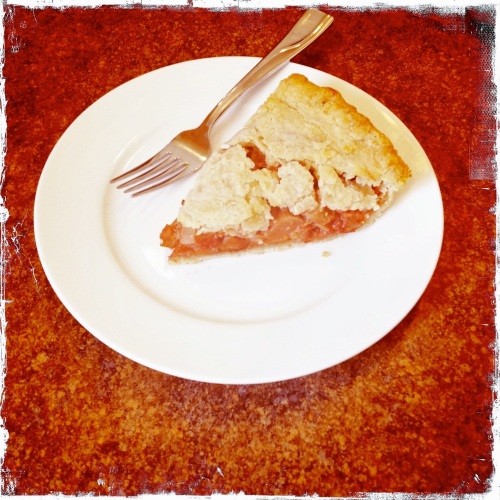
Just snapped some quick shots with the ol’ iPhone cameras, and this was the last piece of pie so it was kinda falling apart and I didn’t get to take one of it glistening when it was hot out of the oven.

Pie is not usually the first dessert I make at home for me and my hubby, even though I come from a long line of pie-making and pie-eating dutch women!  There usually has to be a good reason for me to make it, like Thanksgiving, or an abundance of rhubarb.  🙂  The fun thing about pies though, is the more you make them the better you get at it, and it’s good to be familiar with how to make a good dough and master pie crust.

You can find the recipe over at my cousin’s blog, Born in the Wrong Century.  🙂

Broccoli Cheddar Soup and Pretzel Bread

A little while ago I had mentioned that I made some Broccoli Cheddar Soup and some Pretzel Bread, and wanted to share with you since they turned out so yummy.  The Pretzel Bread was found when I was perusing around this cute blog that I recently stumbled upon, The Apron Archives (isn’t that the cutest name?).  I made sure to pin it so I wouldn’t forget about it.  Turns out I couldn’t stop thinking about it and needed to try making some soon.  So I made it to go with a Broccoli Cheddar Soup the other weekend, and the two made for many heart-warming meals.

The bread is a great one for dipping into soups and making sandwiches with.  I think what I like most about it is that it’s a pretty quick and easy homemade bread to make.  Where most homemade breads are nearly an all day process, the process for Pretzel Bread takes only a few hours.  (Your active working time with it is only a fraction of that three hours).  It was fun to make too, as there’s a little excitement when you get to drop your dough into the pot of boiling water.  Now I want to try making pretzels soon. =)

I won’t write out the Pretzel Bread recipe, as you can find it over here and here.  I highly recommend it, especially if you like making bread but don’t like spending a lot of time on it.

::Broccoli Cheddar Soup::

1/2 yellow onion, chopped
2-3 leeks, quarter lengthwise, rinse, then chop
4 garlic cloves, minced
6-ish potatoes, preferably yukon golds, diced
2 large heads broccoli, chopped
1 qt. chicken stock
6-ish c. whole milk
1-2 T fresh parsley and thyme, chopped
grated cheddar cheese

In a hot pot over med-high heat, sauté onions until translucent, about 4-5 min. Add in leeks and garlic and saute another 4-5 min.  Add in the potatoes and broccoli, a pinch of s+p, and let cook and steam until they’re a little tender, about 7 min., stirring frequently.  Sprinkle in the flour, stir and cook for a few minutes to cook out the raw flour flavor.  Pour in chicken stock and let cook until hot, then stir in whole milk.  Let simmer until the potatoes and broccoli are tender enough to eat and the soup has thickened a little.  Ladle about a third of the soup into a blender and puree.  Pour back into pot.  If you prefer a completely creamy and smooth soup, use an immersion blender, take the pot off the heat and puree the soup until smooth.  (For this soup, my hubby and I prefer the chunks of veggies to bite into, so I puree just some of the soup to make it a little more creamy).  Sprinkle in the fresh herbs, season with salt and pepper to taste.  To serve, garnish with a big pinch of cheddar cheese and enjoy.

I love adding the cheese to the soup as it’s dished up and let it melt in the bowl, as I think the cheese flavor just sort of disappears when added into the big hot soup pot.  This is my kind of dinner (and lunch) for all the cold winter days we’re having.  Enjoy!

Chocolate {Birthday} Cake with Italian Cocoa-Kahlua Buttercream and Ganache

It is not too often a Chocolate Cake comes around that has me describing it as perfect.  And ever since I started making desserts in some of the local restaurants, Chocolate Cake comes around a lot.  This Chocolate Birthday Cake does have me using the word perfect so many times.  It is made with hot coffee and Kahlua, what girl or chocolate-lover wouldn’t call this perfect?

My husband’s birthday was last weekend, and this was his fifth annual Birthday Cake.  I have made it for him every year since we met, and it’s a tradition that will definitely keep on going.  He loves it and really looks forward to it every year.

Chocolate and coffee are so lovely together.  Coffee enhances the flavor of chocolate, and chocolate compliments coffee perfectly, in my opinion.  That combination makes this cake wonderful.  Not to mention that the recipe and method is so easy and simple.  A mixer is not even needed, as all you really use is two large mixing bowls and a whisk.

This cake has rich chocolate flavor, a lovely velvety texture, and the crumb and consistency is just right, as it’s not too dense and not too light and crumbly.  It is perfect for layering, shaping, sculpting, and slicing, which means it would be perfect for a wedding cake with a lot of layers and tiers.

…Notice how many times I use the word perfect?  I really can’t help it!  You’d think I was trying to sell something here.  Well, although I’m not selling anything and getting any richer with this, I hope you print this recipe and give it a try.  And I know I talked it up a lot, so you’ll have to let me know your review once you enjoy a slice of this chocolate heaven.  =)


::Chocolate (Birthday) Cake::
{from Colette Peters book, Cakes to Dream On, modified slightly}

2 c. AP flour
1 t baking soda
pinch of salt

1 3/4 c. hot coffee
1/4 c. Kahlua
5 oz unsweetened baking chocolate, chopped into small pieces
8 oz unsalted butter, cut into small pieces, then to room temp

1 3/4 c. sugar
2 eggs, at room temp
2 t vanilla

Preheat the oven to 300 degrees F.  Coat two 8″ round cake pans with butter and line the bottoms with parchment paper.  (Cut parchment in a round to fit inside the bottom of the cake pan.)

In a medium mixing bowl, sift together the flour, soda, and salt.  Set aside.

In a large mixing bowl, add in the chopped chocolate, Kahlua, and softened butter.  Pour in the hot coffee, make sure it’s very hot.  Give it a little stir, cover the bowl tightly with plastic wrap and let set for about ten minutes until all the mixture is melted.  Stir around until smooth.  (If you still end up with it not all melted you can set your bowl over a saucepan of gently simmering water and stir the chocolate coffee mixture until it’s all smooth.)

Whisk in the sugar, let the mixture cool completely.  Whisk in the dry mix in two batches.  Then whisk in the eggs and vanilla.

Pour the batter into the prepared pans and bake for 40-45 minutes, or until a tester comes out of the center clean.  Rotate the cake pans after 30 minutes if necessary.

Let the cakes cool completely in their pans, set on a wire rack.  After cooling completely, and even letting them refrigerate for a while, you can remove the cakes from the pans.  Run a butter knife along the inside edge of the pan, then set a flat plate or small cutting board over the cake pan, invert, and tap gently upside down.  When you feel the cake fall down, lift up the pan.  Chill the cake layers completely before icing and decorating.

::Cocoa-Kahlua Buttercream::

My basic ratio for Simple Buttercream is 1 lb softened butter for every 2 lbs (about 8 cups) powdered sugar and 1 T vanilla.  I use that basic ratio and just go by it’s creamy, fluffy consistency as I make it.  Buttercream is often made with an egg, but I do not use any.

1 lb butter, softened/room temp
1 lb, 12 oz powdered sugar (or 7 c.)
1/2 c. cocoa
1 or 1 1/2 T Kahlua

In the bowl of a stand mixer fitted with a paddle, cream the softened butter until it’s light and fluffy.  Gradually add in the sugar and the cocoa, scraping down the sides of the bowl as you go.  Add in the Kahlua and continue beating until it is light and smooth.  Do not chill before using.

To ice the cake, it is good to do a crumb coat on the chilled cake first.  Spread icing on the top of one layer, set the other layer on top.  Then simply spread on a thin layer of buttercream on the whole stacked cake, not worrying if the icing picks up some crumbs or not.  Refrigerate that for a bit, then gently spread on your Cocoa Kahlua Buttercream.

For this buttercream, I got to use some Italian Cocoa that my cousin sent me for Christmas.  =)


::Simple Chocolate Ganache::

1 c. chocolate chips (at home I use ghirardelli 60% bittersweet)
1 c. heavy cream

Set the cream in a small saucepan over med-high heat.  Set your chocolate in a medium bowl.  Once the cream reaches a simmer/light boil, pour it over the chocolate and let set a few minutes.  Stir until it’s all melted and smooth.  Use as desired in decorating, or pour in a squeeze bottle to drizzle over the cake as you serve it.

I still want to try making this cake with some Grand Marnier in place of the Kahlua.  Then layer it with Orange Buttercream, using fresh, concentrated orange juice in the place of vanilla, and adding in some orange zest.  I love dark chocolate and orange together.

Cheers and happy baking. =)

Oh Weekend, How I Love Thee

This last weekend I enjoyed a relaxing but semi-productive couple of days full of some baking, cooking, going walking with the dog, a little knitting, and celebrating my husband’s birthday with some friends and family.  (And him too, of course.)

While my man was out snowmobiling for his day I was in my comfy lounge pants making his favorite, fifth annual, Chocolate Birthday Cake.

He loves this cake.  Like REALLY loves it.  So do I of course.  I have made this amazing and oh so perfect Chocolate Cake every year for his birthday since we met, and he always makes sure to hint around the week or two prior to his day to make sure I’ll be making it.  =)  I’m kinda proud that he likes loves it so much and I’ve made it for him every year so far.

I can’t begin to try and tell you how perfect this cake is through my writing, but can just tell you that it is not your ordinary chocolate cake.  It is made with hot coffee and Kahlua, has just the perfect rich chocolate flavor, is perfectly moist, and has just the perfect crumb, structure, and density to hold up to shaping and sculpting (if you want to get that fancy), and velvety texture.  It’s not too heavy or dense, and it is not too light.  This Chocolate Cake is covered in Ganache and Italian Cocoa-Kahlua Buttercream.  The oh-so-wonderful recipe will be up and shared soon.

I also made a pot of my Potato Leek Soup.  This time just simplified it by not roasting the potatoes and leeks.  I really have a thing for soups and stews in the winter.

Also have a thing for knitted hats.  So my brother’s (late) Christmas gift was worked on a little bit…

This is my last of the hats for gifts.  After this is finished, there is a super cute one I’ve found and must make for myself before I’m done with my hat kick.  The Off Piste, pattern and design from the owner of my LYS (local yarn shop), is so cute with the cables and brim.

I thought that for my 2012 knitting goals I would plan and share my next two to three monthly projects ahead of time.  So January’s project is the Off Piste hat for me.

February is going to be the Annie’s Woolens Christmas Stocking.  For the last two years now I have really wanted to make Christmas Stockings for hubby and I, but it keeps getting bumped down the to-do list.  So I’m finally going to make one for myself in February, then make Will’s stocking.  I’m excited about these two projects and about the knitting goal I made for the year.  =)

Also got to enjoy a nice long walk with my two guys over the weekend…

Oh how I love weekends.  =)

THE Perfect Holiday Treat : Apple Zeppoles

I am so excited to share these with you.  Good things are even better when shared, right?  These little babies are so, SO yummy!

I think if my blog ends up being good and useful for one thing, I’d hope that it’s this recipe that gets put to use!

I made these Apple Zeppoles at work this last fall, and now over this holiday season I’ve made them (big batches) two weekends in a row.  Last weekend I cooked up more than 50 for a holiday get together with some friends, and they were a huge, HUGE hit!  Everyone really loves them.  Not to mention my husband who said, as I was cooking all these up and he had a couple, “Maybe we shouldn’t go anywhere…  We could just stay home and eat these.”  Ha!  Good suggestion, honey.  😉  So this weekend we had some friends over for a little dinner, and I had to make them again, of course.

Zeppoles are an Italian dessert like a small fritter or doughnut, and are made with a Pâte à Choux dough.  This pastry dough can be made sweet for lovely treats like profiteroles, or cream puffs, eclairs, beignets, or zeppoles; or it can be made savory for something like cheese popovers.

I started making choux pastry several years ago while working in restaurants, always using it to bake into profiteroles.  But over this past fall season I was having fun using apples in new yummy ways, and I realized how versatile this dough is and what an amazing little zeppole treat it can be turned into.

They’re so comforting and perfect for this time of year, all warm, soft and airy on the inside, with the outside all crisp and rolled in cinnamon and sugar.  If you haven’t made these before, or any choux pastry, don’t shy away!  It is really easy.  Frying up a big batch of the Apple Zeppoles does take a little time, but trust me it is very well worth it!

This slideshow requires JavaScript.

::Apple Zeppoles::
(Adapted and modified from Giada’s Apple Zeppole)

  • 4-5 apples, or 3 c. peeled and grated apples, Granny Smiths work well
  • 1/2 c. sugar
  • 1/2 c. unsalted butter
  • 1 c. water
  • 1/2 t. salt
  • 2 c. AP flour
  • 8 eggs
  • Canola Oil for frying, can combine a little olive oil and/or vegetable oil with it
  • 1 1/2 c. sugar + 1-2 T cinnamon combined in a pie dish

In a large saucepan or deep frying pan, pour in the oil(s) to 2-3 inches deep.  Use a candy thermometer and heat the oil to 360 deg F over medium heat.  Crack all eggs into a bowl and set aside.  Grate all peeled and cored apples (food processor is quick).  I squeeze out the liquid in the grated apple by handfuls as I move it all to a bowl.  You can stir in a little lemon juice and set aside.

For pate choux: In a med/large saucepan, combine the sugar, butter, water, and salt and heat until it’s all melted and starts to boil.  Once it reaches a boil, take off heat and stir in two c. flour with a wooden spoon or rubber spatula.  Keep stirring, set back on hot burner, for 2-ish minutes until the dough forms a ball and is all clumped together.

Transfer the mixture into the bowl of your stand mixer and using the paddle, turn on medium speed and add in the eggs one by one.  Incorporate each egg completely before adding the next.  Beat until smooth and slowly stir in the grated apples.

Set out a baking sheet with paper towels on it, have a soft-tipped tongs or a ‘spider’ ready to use.  Once the oil reaches 350 – 360 deg F, drop in spoonfuls of dough, about 1-2 T each, using a small cookie scooper or a tablespoon.  You want them about 2″ around once cooked.  They will drop to the bottom of the pan and pop back up.  I let each one pop up to the surface before adding the next.  Work in batches so not to over crowd the pan.  Let cook for about 2 minutes then flip over for another 2 min., using the nylon-tipped tongs or the spider.  They will puff up and be very golden brown when done, remove and lay onto paper towel lined baking sheet.  Roll them in the cinnamon + sugar while still warm.  Move them to a serving platter or baking dish and enjoy!

Notes:  Monitor the oil temperature while cooking, it will drop once all the dough is added in so you can turn the heat up a bit while they’re cooking.  If you want to cook up the remaining batter later, the oil can be cooled and set aside (covered) and the batter can be covered with plastic wrap and set in the fridge and used within four or five days.

So the method part is a little long-winded, but don’t run away from this thinking they’re too much work!!  I so hope you make these, you (along with your friends and family) will be glad you did.  =)

And if you so desire, make up some delicious whip cream to complete them:

::Cinnamon Whipped Cream::

1 to 1 1/2 c. whipping cream
3-4 T powdered sugar
1 t. vanilla
1-2 t cinnamon (optional: cardamom, nutmeg, allspice, ginger.. they’re all good here)

In a stand mixer fitted with the whisk, whip the cream to medium-stiff peaks.  Halfway through add in the powdered sugar, vanilla and cinnamon spices.  Set in a bowl and enjoy immediately or set in fridge for later.

Enjoy!  And I hope you’re having a lovely week-before-Christmas.  =)

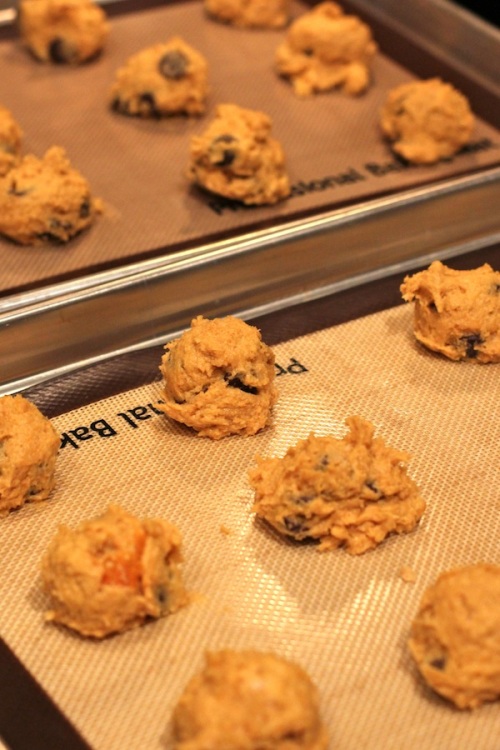
Pumpkin Chocolate Chip Cookies

The chilly weather and changing seasons have really got me nesting and wanting to do a lot of cooking and baking, especially with chickens, apples and pumpkins.  So my mental ‘To Make’ list, and my Queue, has been getting bigger everyday.  My blogging does go through dry spells, but not now.  You’re going to see a lot of those seasonal goodies here for a little while.

I have several different Fall/early Winter desserts up my sleeve to make at work this month, and some to make at home.  I plan on posting some of my restaurant desserts so stay tuned for those yummy recipes!

I’m a little obsessed with pumpkin-y foods right now and have been on a quest to figure out a perfect recipe for Pumpkin Chocolate Chip Cookies.  (I just realized that my blog has not had any cookies appear on it thus far.  What’s up with that??  After this post on cookies, this blog can officially have my name authoring it).

I first tried out this recipe.  It wasn’t great, a little too cake-y.  I want it to be like my chocolate chip cookies would be, but with pumpkin flavor.  So then I tried this one from Dishing the Divine, and modified it a little.  It’s really good.  Better than the first, not too cake-y and lots of pumpkin flavor.  I’m going to make them again soon, adjusting a couple things slightly again, hopefully to end up with exactly what I’m wanting. =)  So here’s my version, modified from the Dishing the Divine recipe.

::Pumpkin Chocolate Chip Cookies::

6 oz unsalted butter, softened
3/4 c. sugar
1/3 c. brown sugar
1 egg
1 t. vanilla
1 c. pumpkin puree

2 c. AP flour
1 t. baking soda
1/2 t. salt
1 t. cinnamon
8 oz chocolate chips

Preheat oven to 350 F.
In a mixing bowl, add all dry ingredients and stir to combine.
Use the creaming method: In a stand mixer, beat softened butter ’til creamy, slowly add the sugars and beat until creamy and a little fluffy.  Mix in egg, vanilla, then pumpkin puree (I had set my puree in a fine mesh sieve to drain a little liquid).
In two batches, gently stir/fold in the dry ingredients with a spatula, incorporate the chocolate chips in with the last half of the dry mix.  Don’t over mix.
Drop spoonfuls of dough onto a baking sheet prepared with butter, parchment paper, or a Silpat.  Bake for 15-ish min., I recommend baking until they’re a deep golden brown, a little darker than what you’d let your regular choc chip cookies get, otherwise these can end up a little too moist.

Even though I have been baking little pie pumpkins and freezing the puree, I used canned puree for these.  I’ll try them again later with the real stuff and see the difference.

If you try these, let me know how you like ’em!  I’m off to go bring some to my hubby, with a tall glass of milk of course.. he’s on the couch watching football. =)

Enjoy 🙂

Courgette Favorites :: Chocolate Zucchini Cake

As much as I’ve been enjoying zucchini lately you would think it was the only vegetable we grew in our garden this year.  However, our zucchini plants were not quite as productive as I was hoping.  I have managed to harvest some from the garden, and supplemented that with visits to the Farmers Markets.  In my recent liking of putting up food for the chilly winter months, a lot of it has been grated and set in the freezer.  Now I can pull out a little package of this good stuff all year long, and make one of my favorite cakes.

My Aunt Connie’s Chocolate Zucchini Cake has been enjoyed by the family for several years now and every time I have a piece, it brings me right back to summer weekends at the family cabin.  So far I’ve made this a few times in the last month, I can’t stop!!  It’s so perfectly moist, spongey, and chocolatey, and hey it has a vegetable in it so it can’t be that bad to eat it everyday, right?  =)

The recipe is featured on my cousin’s blog, where she also includes her ‘healthy’ version.  This is definitely one of my few favs when it comes to zucchini, and when it comes to cake.  I think my hubby said it best when I first made it, “This is the best thing ever invented”.  =)

::Chocolate Zucchini Cake::  
-compliments of Aunt Connie-

2 1/2 c. flour
1/4 c. cocoa powder
1 t. baking soda
1/2 t. baking powder
1/2 t. cinnamon
1/4 t. ground cloves
1/2 t. salt

1/2 c. butter, rm. temp.
1/2 c. canola or safflower oil
1 1/2 c. sugar
2 eggs
1 t. vanilla
1/2 c. sour milk (add in a tsp of lemon juice to milk)

2 c. grated zucchini
optional:
3/4 c. chocolate chips
1/2 c. chopped walnuts

Combine dry ingredients in a mixing bowl.  In another bowl, cream the butter, oil, and sugar, then beat in the eggs and vanilla.  Stir in the sour milk.  Stir in grated zucchini, fold in the dry mixture, spread into a 9×13 dish, and sprinkle chocolate chips and/or walnuts.

Bake at 325 F. for 45 min., or at 350 F for 35-40 min.

Enjoy!  But I warn you, it’ll be your new favorite.