Monthly Archives: November 2011

Grammy’s Hats

I hope all of you had a lovely Thanksgiving!   We had a great time with a lot of family and lots of good food.  During the wonderful long weekend I was able to finish up a couple more of the Grammy’s Hats that I love so much.  I really can’t get enough of these and am on a huge hat kick lately.

These two are for a couple of special little people in our family, and I just can’t wait to see them on the kids!!  Over the big turkey day I had to see how they fit on my cousin’s kids, and they were so kind to model them for me (cutest twin brother and sister ever).  The hats fit them just right and were so cute!

I think they’ll be great for the kids and with the ribbing, they might just last two or three years for them.

And here’s one more that I made for myself.  I had this Manos del Uruguay Wool Clasica sitting in my stash for years now, waiting for me to make a hat with it.

All I can say is I love TFA’s Grammy’s Hats, and am just wanting to make a whole arm-full of them.  =)

A Hat for Mom

I’ve been having a bit of a dry spell lately with my knitting, especially over the summer, but now I’m back into it with all the chilly blustery weather we have been having at home.  Over the summer I did pick out a new exciting project, enthusiastically went to the yarn shop, picked out some yummy yarn, and immediately got to work on it… um, well we got a new puppy.  And there was work, the puppy, gardening, the puppy, and the nice summery weather that really doesn’t inspire and motivate me to get knitting.  So that Whisper Cardigan, that I still really can’t wait to make, is hibernating while I am on a roll with hats and Christmas gifts.

And there are birthday gifts too.  My mom just had her birthday last week so I made this hat for her.  I made a Grammy’s Hat for myself a couple weeks ago with some yarn from my stash, and had to do the same pattern for my mom.  She loves the hat, I love the pattern!  It’s so simple and easy, and has some good texture and style.  The ribbing in it works perfectly for making hats for gifts, since the hat gathers and fits snug on a smaller adult sized head, and stretches to fit a larger size.  And like Tanis mentions on her blog post, the bottom rim is folded up so your ears have double the warmth!  The one I made for myself even fits my husband how he likes them to fit, and that wouldn’t usually happen with just a stockinette stitch style beanie that I usually make.

So far I’ve made a Grammy’s Hat for me, my mom, my nephew, and am now almost done with one for my niece.  I’ll get around to posting pics of them soon, and a pic of mom modeling her hat rather than me!  But for now, I’m just glad that a great hat pattern came around to get me back in the knitting spirit.  =)

::Pattern:: Grammy’s Hat by Tanis Lavallée

::On Ravelry:: here

My Holiday Dinner Must-Have

Several years ago I tried out Tyler Florence’s Green Bean Casserole and have made it during the holidays every year since.  The cremini mushrooms are sauteed with minced shallot and garlic, then made into a cream sauce, the blanched green beans are added to it and it’s all poured into a baking dish, which is then topped with parmesan and homemade croutons and it’s all baked and ready for indulging.

If you’re still making Green Bean Casserole with a can of Campbell’s Cream of Mushroom Soup and a can of green beans, shame on you I’m here to help.  Although I think that classic casserole is enjoyable because it takes me back to my childhood, reminds me of my grandma, is so easy to make, and pretty good with lots of those crunchy french onions on top, I thought I’d share my ‘MUST-have’ for the holiday dinner.

This year for turkey day we will be out of town, but I’m still going to make my favorite casserole, and a dessert (of course!).  I’m pretty excited for all of the holiday fun, so I cooked this up for part of our dinner last weekend.

The recipe is here, I make it pretty much the same.  I do love to use creminis and one big portabella for this, and simply using just fresh thyme to herb it up works well.  I add in a few minced garlic cloves when sauteing the shallots.  The cream sauce can sometimes be a bit thin, so be sure to simmer for 5-7 min. once the cream is poured in.  Only bake the croutons for ten minutes, or just until they’re starting to turn golden since they’ll toast up more later when baking.

My food photography really doesn’t do this delicious dish justice as the pics were taken indoors and at night, but (in my opinion) the holiday dinner table just isn’t complete without it. =)


It was great with the Elk Steak that Will grilled up and the acorn squash that I baked with butter and brown sugar.

The only bad thing about this casserole– it is very likely that you will already be filled up on half of a pan of warm yummy croutons before the dish ever hits the table!

New Digs for Jack

I love the weekends where my hubby and I can just be home and eat, watch movies, and work on projects around the house.  We just had one of those lovely weekends.  I worked on super-cleaning the house, laundry, knitting a hat, made a big pot of Chicken Noodle Soup, and baked some more Pumpkin Chocolate Chip Cookies.  And Will built a dog house for Jack.  He loves getting into a good wood-working project in the garage and he really got into this one, making it nice and cozy, complete with insulation, windows, and shingles on the roof.

Running away with daddy’s wood scraps.  (He probably did ingest about that much wood over the weekend)…


The finished house turned out pretty cute!  Now this guy has a comfy bed and a shelter when he gets all frosty-faced…


Of course he would rather be inside with us, but we think he likes his new pad for when he has to be outside.  =)

Half of a Beef In the Freezer!

Well our half of a Beef made it to our freezer this weekend.  My husband has a buddy that is a rancher down in SW Montana, and this year he had a few Angus yearlings that he wanted to unload so he asked us if we’d like one.  Of course we would!  My parents split it with us and got the other half.  He gave us a great deal, butchered it, and brought it to the meat processing shop for us.  I’m pretty excited about having over 200 lbs of local Montana-raised, grass-fed Angus Beef!  Our freezer is looking pretty happy.  =)  There will be a lot of fun dinners to make with all of this, so you’ll be seeing some yummy recipes and dishes on here for a while.

Earlier this weekend I sorted out the upright freezer and made room for all the meat.  I stuffed all of my frozen summer vegetables, berries, and fruit on the top, and my containers of homemade chicken stock and some soup in the door.  A couple shelves are stuffed with a lot of elk meat, and the rest is the beef!

And Will has a fun DIY project keeping him busy this weekend, here’s just a preview…


A house for Jackson!  I’m loving it, he started it yesterday and today is almost done with it.  I’m pretty sure it will be the coziest, cutest dog house on the block, complete with a window, trim, and a shingled roof that will never get leaky.  =)

Fall Canning: Apple Butter

Okay, NOW I think I’m done canning for the year.  I finished processing all of the thirty pounds of apples I got, and after doing two rounds of Applesauce, I cooked up a huge pot of Apple Butter and canned it all.  Ended up getting seven half-pints and two pint jars.

I’m so excited about this one, it was my first time doing a fruit butter.  It is so, SO yummy!  It cooks down and the sugars caramelize, the fruit butter gets very rich, thick, smooth, and a beautiful pinkish-golden color.  I could eat it in bowl-fulls spoonfuls.  🙂  It’s just a cinnamon-y taste of the Holidays that are just around the corner.  Seriously, when you have a spoonful you immediately think Thanksgiving and Christmas.

Now that I’ve canned pickled stuff: Pickled Beets, Dilly Beans, Dill Pickles, Cinnamon Applesauce, jam, jelly, and now finally fruit butter, I totally think that if I was only able to can one thing for the rest of my life, it would be this.  Mostly because I can’t get enough and you could incorporate it into some holiday baking, but also because it’s so easy to make and preserve.  Once it’s all in the pot, you just let it cook down, stirring occasionally and let it go for about two to three hours.  Since it’s all thick and sugary it stays very hot, so you don’t have to worry about the mixture cooling down too much before you get it in the jars and then get them sealed and in the water bath.

It’s so easy, so rich, flavorful, delicious, festive, and so worth making.  Even if you’re not canning, make a pot of it on the stovetop or crock pot, fill into a couple jars and they stay good refrigerated for up to two months!

I spread the Apple Butter on these crackers– the Organic Stoneground Wheat crackers- with cream cheese and it’s the perfect snack.  I did this last night and my husband was surprised how good they were, he kept coming back for more.  We thought they were like little bites of Apple Pie or Apple Turnovers.  =)

::Apple Butter::

8-9 lbs apples, peeled, cored, chopped
Juice of 2 lemons
3 c. apple cider
3 c. sugar
1-2 t. ground cinnamon
1/2 t. cloves

Place all chopped apples in a large non-reactive saucepan or dutch oven with the lemon juice and cider, and 1 c. water.  Bring to a boil and then reduce to low, cover and simmer for about 30-40 min. until soft.

Move pot off of heat and puree with an immersion hand blender (or transfer it into a food processor in batches) until apple mixture is smooth.  Place back onto heat and add the sugar and spices.  Cook uncovered for about 1 1/2 to 2 1/2 hours over medium-low heat until the apple butter has reduced quite a bit, is thick and mounds on a spoon.  Stir often.

Fill hot, sterilized half-pint jars and leave 1/4″ headspace, remove air bubbles, wipe rims clean and seal the jars with the lids and rings, semi-tight.  Process the jars in boiling water bath for 10 min. (add 1 min. for every 1k’ elevation, I processed mine for 13-14 min.).  Store in a cool dry place for up to a year, if you can let it last that long!  Open jars are good refrigerated for up to two months.

Pumpkin Chocolate Chip Cookies

The chilly weather and changing seasons have really got me nesting and wanting to do a lot of cooking and baking, especially with chickens, apples and pumpkins.  So my mental ‘To Make’ list, and my Queue, has been getting bigger everyday.  My blogging does go through dry spells, but not now.  You’re going to see a lot of those seasonal goodies here for a little while.

I have several different Fall/early Winter desserts up my sleeve to make at work this month, and some to make at home.  I plan on posting some of my restaurant desserts so stay tuned for those yummy recipes!

I’m a little obsessed with pumpkin-y foods right now and have been on a quest to figure out a perfect recipe for Pumpkin Chocolate Chip Cookies.  (I just realized that my blog has not had any cookies appear on it thus far.  What’s up with that??  After this post on cookies, this blog can officially have my name authoring it).

I first tried out this recipe.  It wasn’t great, a little too cake-y.  I want it to be like my chocolate chip cookies would be, but with pumpkin flavor.  So then I tried this one from Dishing the Divine, and modified it a little.  It’s really good.  Better than the first, not too cake-y and lots of pumpkin flavor.  I’m going to make them again soon, adjusting a couple things slightly again, hopefully to end up with exactly what I’m wanting. =)  So here’s my version, modified from the Dishing the Divine recipe.

::Pumpkin Chocolate Chip Cookies::

6 oz unsalted butter, softened
3/4 c. sugar
1/3 c. brown sugar
1 egg
1 t. vanilla
1 c. pumpkin puree

2 c. AP flour
1 t. baking soda
1/2 t. salt
1 t. cinnamon
8 oz chocolate chips

Preheat oven to 350 F.
In a mixing bowl, add all dry ingredients and stir to combine.
Use the creaming method: In a stand mixer, beat softened butter ’til creamy, slowly add the sugars and beat until creamy and a little fluffy.  Mix in egg, vanilla, then pumpkin puree (I had set my puree in a fine mesh sieve to drain a little liquid).
In two batches, gently stir/fold in the dry ingredients with a spatula, incorporate the chocolate chips in with the last half of the dry mix.  Don’t over mix.
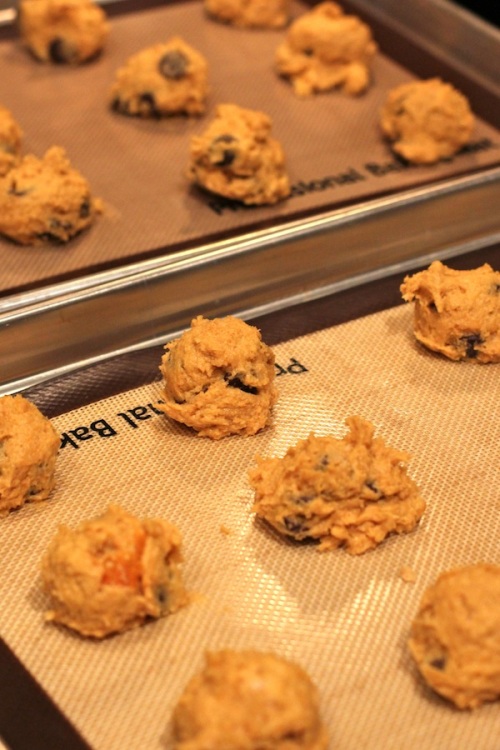
Drop spoonfuls of dough onto a baking sheet prepared with butter, parchment paper, or a Silpat.  Bake for 15-ish min., I recommend baking until they’re a deep golden brown, a little darker than what you’d let your regular choc chip cookies get, otherwise these can end up a little too moist.

Even though I have been baking little pie pumpkins and freezing the puree, I used canned puree for these.  I’ll try them again later with the real stuff and see the difference.

If you try these, let me know how you like ’em!  I’m off to go bring some to my hubby, with a tall glass of milk of course.. he’s on the couch watching football. =)

Enjoy 🙂