Tag Archives: dessert

Strawberry Rhubarb Pie

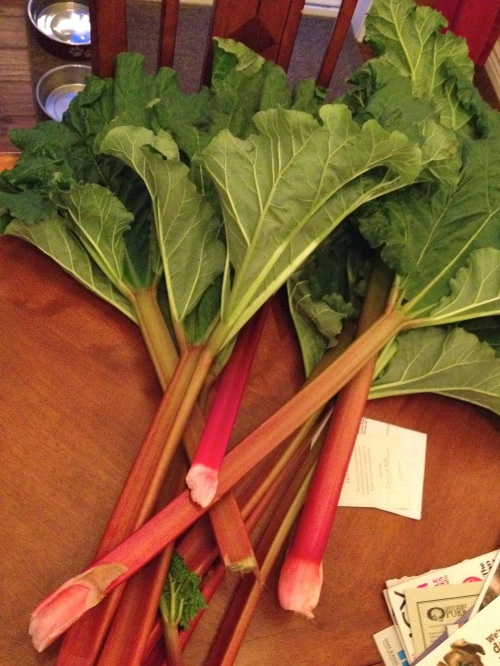
It’s spring in Montana, so that means there are some yummy treats being made with our rhubarb.  This is our plant’s third season planted here, and I love seeing it come back bigger and better every year.

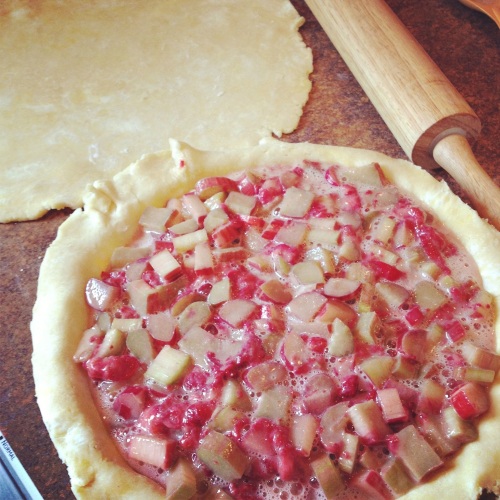
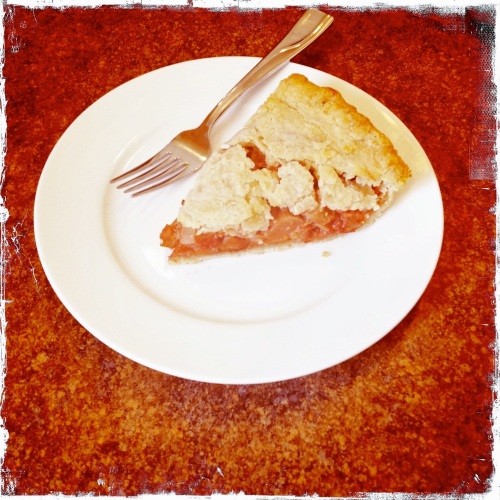
The leaves and stalks are huge, they took up half of our dining room table.  I froze a lot of berries last summer from our garden and some produce farms in WA that we visited, so with the strawberries I stored away in the freezer I’ve been making Strawberry-Rhubarb Custard Pie lately.  So good, I love the sweet and tart combination.

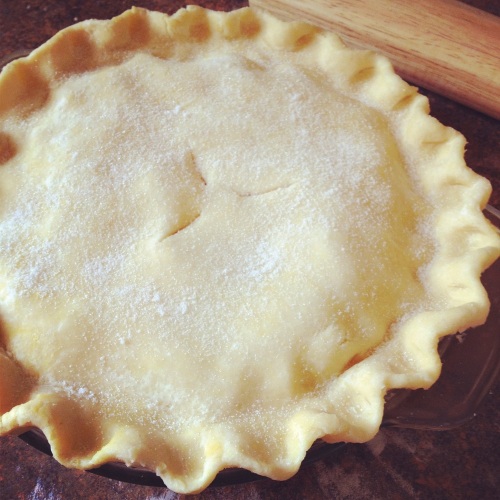
Just snapped some quick shots with the ol’ iPhone cameras, and this was the last piece of pie so it was kinda falling apart and I didn’t get to take one of it glistening when it was hot out of the oven.

Pie is not usually the first dessert I make at home for me and my hubby, even though I come from a long line of pie-making and pie-eating dutch women!  There usually has to be a good reason for me to make it, like Thanksgiving, or an abundance of rhubarb.  🙂  The fun thing about pies though, is the more you make them the better you get at it, and it’s good to be familiar with how to make a good dough and master pie crust.

You can find the recipe over at my cousin’s blog, Born in the Wrong Century.  🙂

Chocolate {Birthday} Cake with Italian Cocoa-Kahlua Buttercream and Ganache

It is not too often a Chocolate Cake comes around that has me describing it as perfect.  And ever since I started making desserts in some of the local restaurants, Chocolate Cake comes around a lot.  This Chocolate Birthday Cake does have me using the word perfect so many times.  It is made with hot coffee and Kahlua, what girl or chocolate-lover wouldn’t call this perfect?

My husband’s birthday was last weekend, and this was his fifth annual Birthday Cake.  I have made it for him every year since we met, and it’s a tradition that will definitely keep on going.  He loves it and really looks forward to it every year.

Chocolate and coffee are so lovely together.  Coffee enhances the flavor of chocolate, and chocolate compliments coffee perfectly, in my opinion.  That combination makes this cake wonderful.  Not to mention that the recipe and method is so easy and simple.  A mixer is not even needed, as all you really use is two large mixing bowls and a whisk.

This cake has rich chocolate flavor, a lovely velvety texture, and the crumb and consistency is just right, as it’s not too dense and not too light and crumbly.  It is perfect for layering, shaping, sculpting, and slicing, which means it would be perfect for a wedding cake with a lot of layers and tiers.

…Notice how many times I use the word perfect?  I really can’t help it!  You’d think I was trying to sell something here.  Well, although I’m not selling anything and getting any richer with this, I hope you print this recipe and give it a try.  And I know I talked it up a lot, so you’ll have to let me know your review once you enjoy a slice of this chocolate heaven.  =)


::Chocolate (Birthday) Cake::
{from Colette Peters book, Cakes to Dream On, modified slightly}

2 c. AP flour
1 t baking soda
pinch of salt

1 3/4 c. hot coffee
1/4 c. Kahlua
5 oz unsweetened baking chocolate, chopped into small pieces
8 oz unsalted butter, cut into small pieces, then to room temp

1 3/4 c. sugar
2 eggs, at room temp
2 t vanilla

Preheat the oven to 300 degrees F.  Coat two 8″ round cake pans with butter and line the bottoms with parchment paper.  (Cut parchment in a round to fit inside the bottom of the cake pan.)

In a medium mixing bowl, sift together the flour, soda, and salt.  Set aside.

In a large mixing bowl, add in the chopped chocolate, Kahlua, and softened butter.  Pour in the hot coffee, make sure it’s very hot.  Give it a little stir, cover the bowl tightly with plastic wrap and let set for about ten minutes until all the mixture is melted.  Stir around until smooth.  (If you still end up with it not all melted you can set your bowl over a saucepan of gently simmering water and stir the chocolate coffee mixture until it’s all smooth.)

Whisk in the sugar, let the mixture cool completely.  Whisk in the dry mix in two batches.  Then whisk in the eggs and vanilla.

Pour the batter into the prepared pans and bake for 40-45 minutes, or until a tester comes out of the center clean.  Rotate the cake pans after 30 minutes if necessary.

Let the cakes cool completely in their pans, set on a wire rack.  After cooling completely, and even letting them refrigerate for a while, you can remove the cakes from the pans.  Run a butter knife along the inside edge of the pan, then set a flat plate or small cutting board over the cake pan, invert, and tap gently upside down.  When you feel the cake fall down, lift up the pan.  Chill the cake layers completely before icing and decorating.

::Cocoa-Kahlua Buttercream::

My basic ratio for Simple Buttercream is 1 lb softened butter for every 2 lbs (about 8 cups) powdered sugar and 1 T vanilla.  I use that basic ratio and just go by it’s creamy, fluffy consistency as I make it.  Buttercream is often made with an egg, but I do not use any.

1 lb butter, softened/room temp
1 lb, 12 oz powdered sugar (or 7 c.)
1/2 c. cocoa
1 or 1 1/2 T Kahlua

In the bowl of a stand mixer fitted with a paddle, cream the softened butter until it’s light and fluffy.  Gradually add in the sugar and the cocoa, scraping down the sides of the bowl as you go.  Add in the Kahlua and continue beating until it is light and smooth.  Do not chill before using.

To ice the cake, it is good to do a crumb coat on the chilled cake first.  Spread icing on the top of one layer, set the other layer on top.  Then simply spread on a thin layer of buttercream on the whole stacked cake, not worrying if the icing picks up some crumbs or not.  Refrigerate that for a bit, then gently spread on your Cocoa Kahlua Buttercream.

For this buttercream, I got to use some Italian Cocoa that my cousin sent me for Christmas.  =)


::Simple Chocolate Ganache::

1 c. chocolate chips (at home I use ghirardelli 60% bittersweet)
1 c. heavy cream

Set the cream in a small saucepan over med-high heat.  Set your chocolate in a medium bowl.  Once the cream reaches a simmer/light boil, pour it over the chocolate and let set a few minutes.  Stir until it’s all melted and smooth.  Use as desired in decorating, or pour in a squeeze bottle to drizzle over the cake as you serve it.

I still want to try making this cake with some Grand Marnier in place of the Kahlua.  Then layer it with Orange Buttercream, using fresh, concentrated orange juice in the place of vanilla, and adding in some orange zest.  I love dark chocolate and orange together.

Cheers and happy baking. =)

THE Perfect Holiday Treat : Apple Zeppoles

I am so excited to share these with you.  Good things are even better when shared, right?  These little babies are so, SO yummy!

I think if my blog ends up being good and useful for one thing, I’d hope that it’s this recipe that gets put to use!

I made these Apple Zeppoles at work this last fall, and now over this holiday season I’ve made them (big batches) two weekends in a row.  Last weekend I cooked up more than 50 for a holiday get together with some friends, and they were a huge, HUGE hit!  Everyone really loves them.  Not to mention my husband who said, as I was cooking all these up and he had a couple, “Maybe we shouldn’t go anywhere…  We could just stay home and eat these.”  Ha!  Good suggestion, honey.  😉  So this weekend we had some friends over for a little dinner, and I had to make them again, of course.

Zeppoles are an Italian dessert like a small fritter or doughnut, and are made with a Pâte à Choux dough.  This pastry dough can be made sweet for lovely treats like profiteroles, or cream puffs, eclairs, beignets, or zeppoles; or it can be made savory for something like cheese popovers.

I started making choux pastry several years ago while working in restaurants, always using it to bake into profiteroles.  But over this past fall season I was having fun using apples in new yummy ways, and I realized how versatile this dough is and what an amazing little zeppole treat it can be turned into.

They’re so comforting and perfect for this time of year, all warm, soft and airy on the inside, with the outside all crisp and rolled in cinnamon and sugar.  If you haven’t made these before, or any choux pastry, don’t shy away!  It is really easy.  Frying up a big batch of the Apple Zeppoles does take a little time, but trust me it is very well worth it!

This slideshow requires JavaScript.

::Apple Zeppoles::
(Adapted and modified from Giada’s Apple Zeppole)

  • 4-5 apples, or 3 c. peeled and grated apples, Granny Smiths work well
  • 1/2 c. sugar
  • 1/2 c. unsalted butter
  • 1 c. water
  • 1/2 t. salt
  • 2 c. AP flour
  • 8 eggs
  • Canola Oil for frying, can combine a little olive oil and/or vegetable oil with it
  • 1 1/2 c. sugar + 1-2 T cinnamon combined in a pie dish

In a large saucepan or deep frying pan, pour in the oil(s) to 2-3 inches deep.  Use a candy thermometer and heat the oil to 360 deg F over medium heat.  Crack all eggs into a bowl and set aside.  Grate all peeled and cored apples (food processor is quick).  I squeeze out the liquid in the grated apple by handfuls as I move it all to a bowl.  You can stir in a little lemon juice and set aside.

For pate choux: In a med/large saucepan, combine the sugar, butter, water, and salt and heat until it’s all melted and starts to boil.  Once it reaches a boil, take off heat and stir in two c. flour with a wooden spoon or rubber spatula.  Keep stirring, set back on hot burner, for 2-ish minutes until the dough forms a ball and is all clumped together.

Transfer the mixture into the bowl of your stand mixer and using the paddle, turn on medium speed and add in the eggs one by one.  Incorporate each egg completely before adding the next.  Beat until smooth and slowly stir in the grated apples.

Set out a baking sheet with paper towels on it, have a soft-tipped tongs or a ‘spider’ ready to use.  Once the oil reaches 350 – 360 deg F, drop in spoonfuls of dough, about 1-2 T each, using a small cookie scooper or a tablespoon.  You want them about 2″ around once cooked.  They will drop to the bottom of the pan and pop back up.  I let each one pop up to the surface before adding the next.  Work in batches so not to over crowd the pan.  Let cook for about 2 minutes then flip over for another 2 min., using the nylon-tipped tongs or the spider.  They will puff up and be very golden brown when done, remove and lay onto paper towel lined baking sheet.  Roll them in the cinnamon + sugar while still warm.  Move them to a serving platter or baking dish and enjoy!

Notes:  Monitor the oil temperature while cooking, it will drop once all the dough is added in so you can turn the heat up a bit while they’re cooking.  If you want to cook up the remaining batter later, the oil can be cooled and set aside (covered) and the batter can be covered with plastic wrap and set in the fridge and used within four or five days.

So the method part is a little long-winded, but don’t run away from this thinking they’re too much work!!  I so hope you make these, you (along with your friends and family) will be glad you did.  =)

And if you so desire, make up some delicious whip cream to complete them:

::Cinnamon Whipped Cream::

1 to 1 1/2 c. whipping cream
3-4 T powdered sugar
1 t. vanilla
1-2 t cinnamon (optional: cardamom, nutmeg, allspice, ginger.. they’re all good here)

In a stand mixer fitted with the whisk, whip the cream to medium-stiff peaks.  Halfway through add in the powdered sugar, vanilla and cinnamon spices.  Set in a bowl and enjoy immediately or set in fridge for later.

Enjoy!  And I hope you’re having a lovely week-before-Christmas.  =)

Courgette Favorites :: Chocolate Zucchini Cake

As much as I’ve been enjoying zucchini lately you would think it was the only vegetable we grew in our garden this year.  However, our zucchini plants were not quite as productive as I was hoping.  I have managed to harvest some from the garden, and supplemented that with visits to the Farmers Markets.  In my recent liking of putting up food for the chilly winter months, a lot of it has been grated and set in the freezer.  Now I can pull out a little package of this good stuff all year long, and make one of my favorite cakes.

My Aunt Connie’s Chocolate Zucchini Cake has been enjoyed by the family for several years now and every time I have a piece, it brings me right back to summer weekends at the family cabin.  So far I’ve made this a few times in the last month, I can’t stop!!  It’s so perfectly moist, spongey, and chocolatey, and hey it has a vegetable in it so it can’t be that bad to eat it everyday, right?  =)

The recipe is featured on my cousin’s blog, where she also includes her ‘healthy’ version.  This is definitely one of my few favs when it comes to zucchini, and when it comes to cake.  I think my hubby said it best when I first made it, “This is the best thing ever invented”.  =)

::Chocolate Zucchini Cake::  
-compliments of Aunt Connie-

2 1/2 c. flour
1/4 c. cocoa powder
1 t. baking soda
1/2 t. baking powder
1/2 t. cinnamon
1/4 t. ground cloves
1/2 t. salt

1/2 c. butter, rm. temp.
1/2 c. canola or safflower oil
1 1/2 c. sugar
2 eggs
1 t. vanilla
1/2 c. sour milk (add in a tsp of lemon juice to milk)

2 c. grated zucchini
optional:
3/4 c. chocolate chips
1/2 c. chopped walnuts

Combine dry ingredients in a mixing bowl.  In another bowl, cream the butter, oil, and sugar, then beat in the eggs and vanilla.  Stir in the sour milk.  Stir in grated zucchini, fold in the dry mixture, spread into a 9×13 dish, and sprinkle chocolate chips and/or walnuts.

Bake at 325 F. for 45 min., or at 350 F for 35-40 min.

Enjoy!  But I warn you, it’ll be your new favorite.

Cobble Cobble!

I am crazy for cobblers all of a sudden.  After making them at work last week, I got to thinking about my Flathead Cherries I still have in my freezer from last summer that I pitted and vacuum packed, and thinking about how they need to be used!  A cobbler can really be whipped out in no time, and in my opinion it’s just as good as pie, or better.  Without as much work!

Over the last few years I have grown to love the use of the freezer, and learned how to really take advantage of it.  One of my favorite things is reaching in the freezer in the winter or even Spring, when we don’t yet have all the fresh berries and produce, and grabbing a ‘little piece of Summer’ to thaw and use.  Around here you really can’t miss out on enjoying Flathead Cherries in the summer time.  However, one could easily miss out on enjoying Flathead Cherries any other time of year, if you don’t go to a little extra work when you get them to store some away and take advantage of that freezer!  It is so worth it and rewarding.

::Flathead Cherry Cobbler::

I made it the same as previously mentioned, but for the filling just did:

2 1/2 lbs cherries, pitted
3/4 – 1 c. sugar
1 T. instant tapioca
1 T. AP flour
zest of 1 orange

That’s it!  SO good.

Mixed Berry Cobblers

Here’s a little Spring/Summer baking inspiration.  I made these beauty-ful berry-ful Mixed Berry Cobblers at work today.  Cobblers are so perfect for this time of year, especially during summer when the berries are ripe and fresh.  Here I used fresh strawberries, blueberries, and frozen huckleberries.  This cobbler topping is absolutely perfect, and everything that it should be.  I read that the topping is supposed to look kind of piece-y and lumpy, like cobblestones, which is how it got it’s name.

I had to take a quick shot with my phone camera as I was working, since they were looking so mouth-watering delicious when I pulled them out.  I’m not ever there in the evening when they’re plating them up all pretty and serving them in all their glory, but really these guys don’t need much dressing and garnishing, perfect right out of the oven just like this.  I will definitely be making more cobblers throughout the Spring and Summer…

::Recipe::  Mixed Berry Cobblers

Fruit filling:

2 c. strawberries, quartered or halved
3 c. blueberries, huckleberries, and/or any other fruit of your choosing
3/4 c. sugar
1 T. flour
1 1/2 T. instant tapioca
1-2 T. juice of lemon or orange
zest of 1 lemon or orange, (optional)

Toss all together in a large bowl, set aside.

Cobbler topping:

1 3/4 c. AP flour
1/2 c. sugar
pinch of salt
2 1/2 t. baking powder
4 oz. (1/2 c.) cold butter, cut into cubes
1 egg + 1 yolk
2/3 c. heavy cream

Preheat oven to 375 F.
Combine the dry ingredients in a mixing bowl.  Work the cold butter cubes into the dry mix with your fingertips, rubbing into the dry mix until the butter pieces are the size of peas.  Combine the egg, yolk, and cream in a small bowl, stir together, then gently stir into the flour mixture only until combined, careful not to over-work or over mix.  The dough should be loose, lumpy, and light.

Pour fruit mixture into a buttered baking dish (9 x 9) or individual baking dishes.  Carefully drop spoonfuls of dough on top of fruit, leaving it loose and lumpy, it should look rough and rustic, like cobblestones.  Bake until topping is golden brown, about 40-50 min.

Enjoy warm or at room temperature, better yet with a scoop of Vanilla Ice Cream.

Cheers!